This article will guide you on how to setup load balancing in pfsense as a way on making the speed of your internet more faster. As an experience in setting up load balancing I had observe that all gateway speed are summing it up. It means your internet connections will become faster. In order to implement load balancing in pfsense, your network must have at least two or more internet sources.
As the name implies, load balance, means that we have to implement a balance internet sources or throughput throughout the entire network. This is very applicable to some company or business establishments who experience regular internet outages even if they have more than one internet sources and does not have the knowledge on how to use this very nice capabilities in pfsense like load balancing. The purpose of load balancing does not limit only to what we expect as to balance internet bandwidth. It also increases the speed of your internet by summing up all your gateway speed if you have multiple WAN connections. The idea of this is through the creation of gateway groups used for load balancing. The steps I will give you bellow is only my way of doing the setup of load balancing in pfsense.
This example uses three internet sources or WAN gateways.
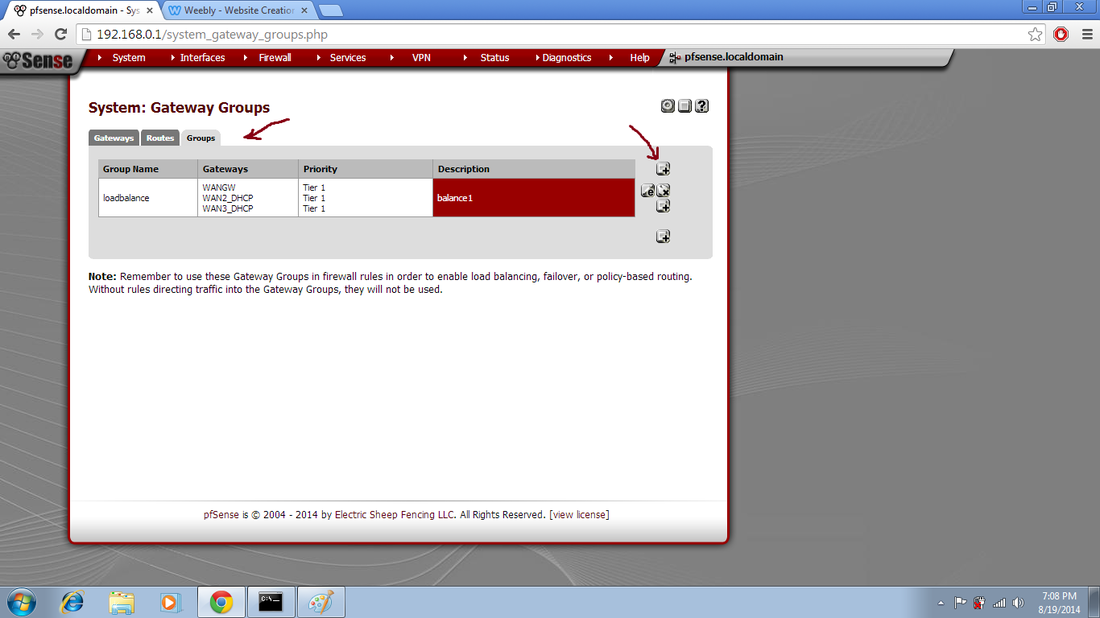
1. If you have been configured each gateway correctly and tested it to browse the internet, then the first step you should do for load balancing these three sources is to group them by creating a group in the System -> Routing menu. Click on Group tab and click on plus(+) sign to add a group.
1. If you have been configured each gateway correctly and tested it to browse the internet, then the first step you should do for load balancing these three sources is to group them by creating a group in the System -> Routing menu. Click on Group tab and click on plus(+) sign to add a group.
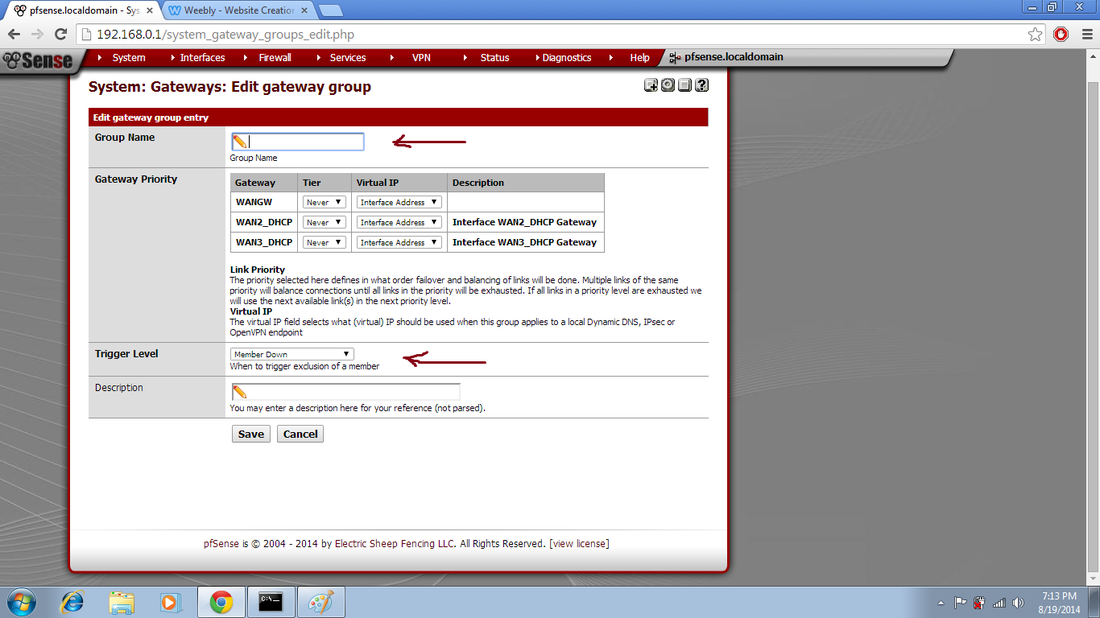
2. Enter a group name and select tier for the group. Tier means a link to which the load balances until all links are exhausted. Then it will find a balance on the next tier. Leave the Virtual IP to default. Select Trigger Level of your choice. This will tell how to balance the three gateways. It only depends on your preferences or choice. If one gateway will goes down, then the two remaining gateway will backup. This rule will apply to triggering when one member down. If you only trigger when one gateway losses packet , then choose packet loss trigger. Click save when done.
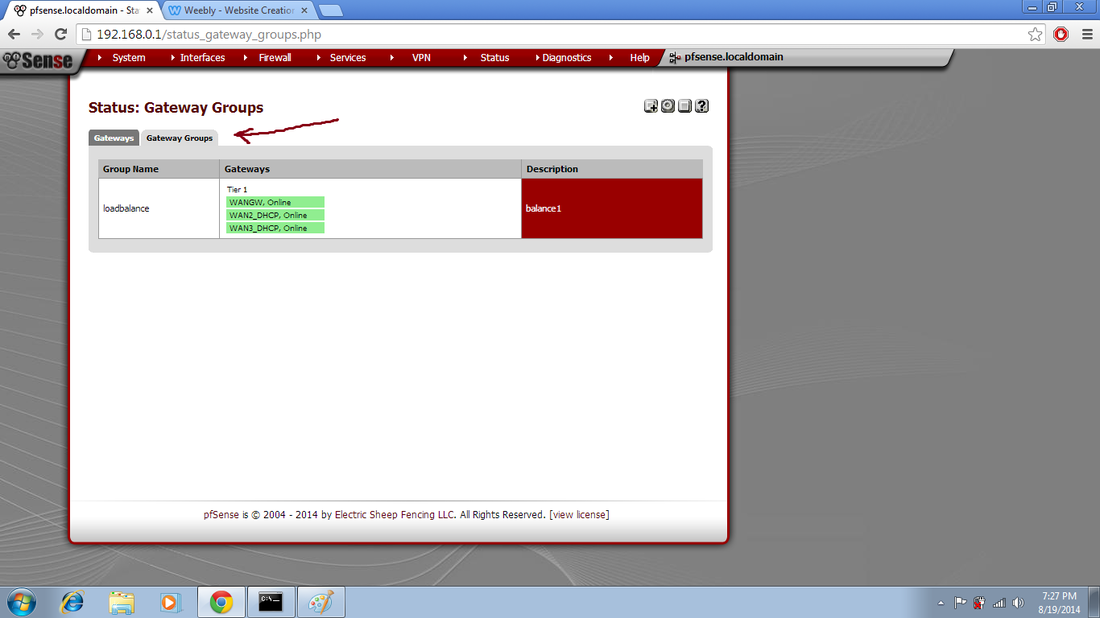
3. Check if the group successfully created by going to Status - > Gateways menu and click on Gateway Groups. As you can see, all gateways are working well and fine. This is a good sign that your load balancing is in good shape.
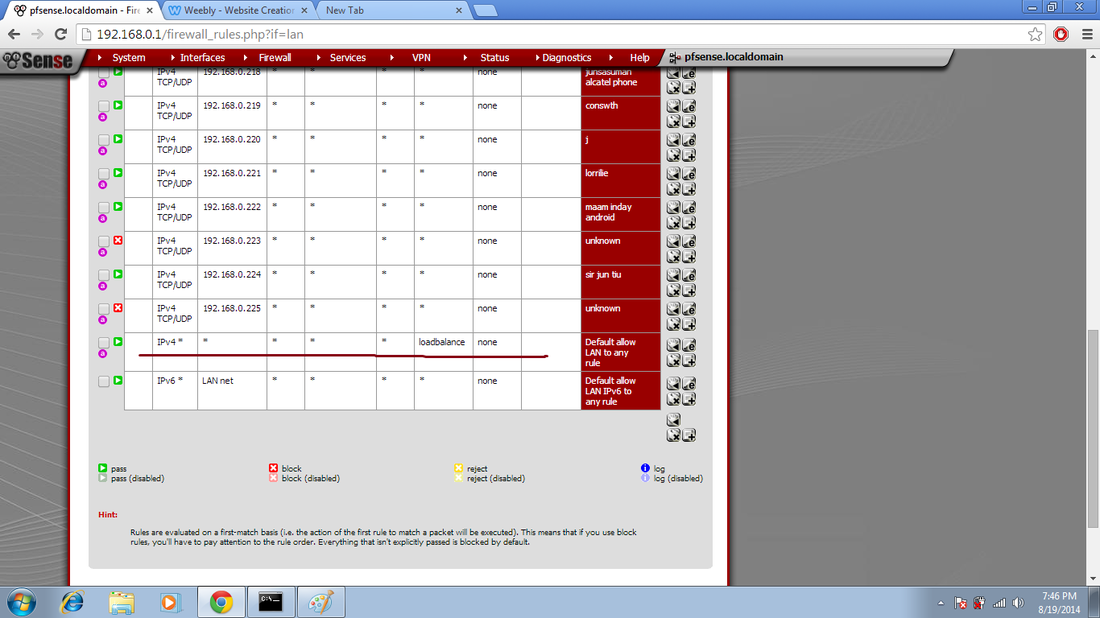
4. Create a Rule in your LAN interface to be able this load balance setup possible. On your pfsense menu Firewall -> Rules, add a rule to your LAN tab for the gateway groups. This will enable the load balancing you created.Click on plus sign (+) to add a rule. You can add this rule before any or after all the rules you created.
After doing all the steps, test your internet speed if this trick really works. Compute your internet speed results if its summing up each gateway speed. And try to bring one gateway port down if the two other gateways are really backing-up. If you cannot connect to the internet after you unplug or putting down one gateway, then the load balancing rule failed. Just try to setup again and make some changes for some errors. I hope this one will help you or guide you.
Thank you for reading my post.
Thank you for reading my post.
