This blog will guide on how to setup Pfsense captive portal feature. Captive portal in Pfsense is very useful in a network which has wifi enabled. Captive portal can control users internet usage. It also sets up users download and upload bandwidth limit. All users connected in a wifi router or access point must enable to login using users and password. If they don't have user and password, an assigned ticket number is an alternative for them to login and join the network to have internet access. You can also configure captive portal to redirect to your own site and have them login to the network. You can do many stuff with Pfsense captive portal. It only depends on how you use it. Bellow are the steps on how you can setup pfsense captive portal.
Assign A WIFI LAN Interface for Pfsense Captive Portal
To setup captive portal in pfsense, you need to assign a dedicated LAN that will be connected to your WIFI router or switch. It is better to set it up as a DHCP.
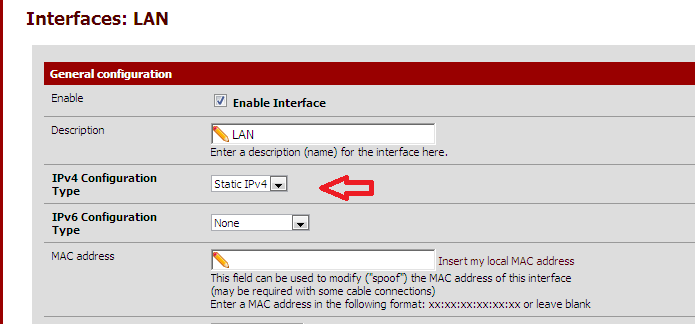
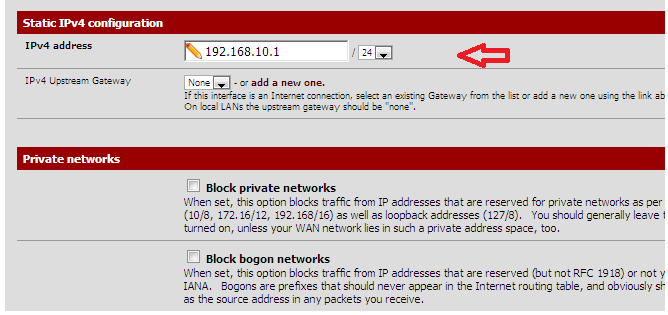
To Setup a WIFI LAN Interface, head over to your pfsense menu and click on interfaces->assign. Configure you LAN interface with a static IP Address and then enable this LAN to serve as DHCP. By doing so, take a look at the setup bellow. I've already figure out this for you as an example.
To Setup a WIFI LAN Interface, head over to your pfsense menu and click on interfaces->assign. Configure you LAN interface with a static IP Address and then enable this LAN to serve as DHCP. By doing so, take a look at the setup bellow. I've already figure out this for you as an example.
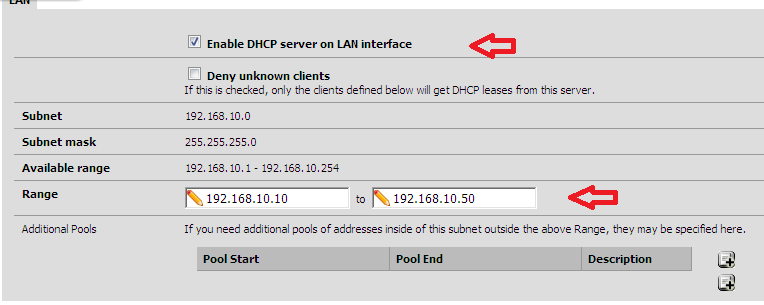
Next Step is to enable the LAN to serve as DHCP. Go to Services->DHCP Server. Take a look the example image bellow on how to enable DHCP for this LAN. This example shows a LAN as a DHCP with staring range IP of 192.168.10.10 to end IP of 192.168.10.50. So this LAN can up to 51 clients.
After assign a LAN for your WIFI, go to Services->Captive Portal to begin setting up.
For Captive Portal to work, you need to add a Zone. You will setup a zone name upon adding a captive portal. When a captive portal has been added, go and edit some important settings for a captive portal to work.
For Captive Portal to work, you need to add a Zone. You will setup a zone name upon adding a captive portal. When a captive portal has been added, go and edit some important settings for a captive portal to work.
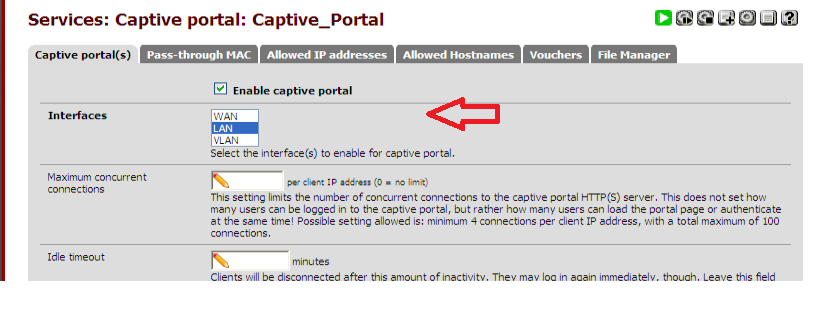
The important setup you must have for a captive portal to work.
1. Enable captive portal and choose the interface you want captive portal to work on.
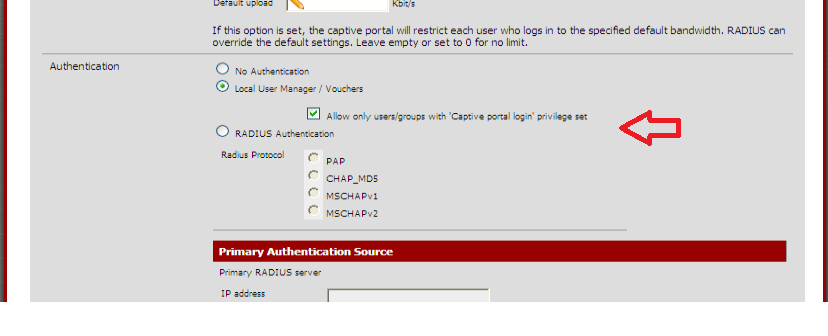
2. Provide local user authentication or vouchers to login to the captive portal network.
For some configurations, you may setup it if you want.
Then after saving the captive portal setup, go a head and connect to the network and browse the internet if will be redirected to the captive portal login.
1. Enable captive portal and choose the interface you want captive portal to work on.
2. Provide local user authentication or vouchers to login to the captive portal network.
For some configurations, you may setup it if you want.
Then after saving the captive portal setup, go a head and connect to the network and browse the internet if will be redirected to the captive portal login.