
This blog will guide you on how to setup the download and upload bandwidth limit on a specific computer in a network controlled by pfsense router. As a network administrator, it is your responsibility to track down bandwidth usage in your network. And this is really a tough job if you don't have a network management tool like pfsense. You never know who are those users in your network consumes large amount of bandwidth. In effect, this will cause a bottle neck in the network. With pfsense this job is a very easy to implement. It has many features with regards to network management like setting bandwidth usable on each network computer. With this feature in pfsense, you can have the confidence that your network will not run-out of usable bandwidth. Try following my example steps bellow on how to make a bandwidth limiter and applying this rule to a specific user or computer in your network.
Using a bandwidth limiter feature in pfsense to set the download and upload speed limit.
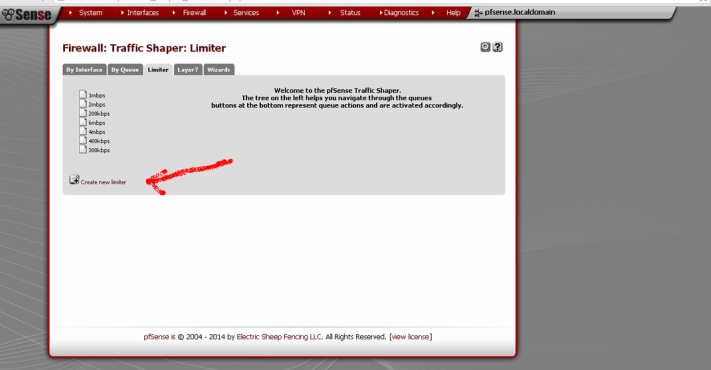
1. To setup a bandwidth limiter go to pfsense menu Firewall -> Traffic Shaper -> Limiter and click on Create new limiter
1. To setup a bandwidth limiter go to pfsense menu Firewall -> Traffic Shaper -> Limiter and click on Create new limiter
2. Set your configuration settings for download and upload speed limit one at a time.
Enable - click the checkbox to enable limiter and its children.
Name - specify a name for the limiter (ex. download_limit).
Bandwidth - click on plus(+) to set the bandwidth for download_limit.
Ex. Bandwidth - 1 Burst- leave it blank Bw type - kbit/s or mbit/s
Mask - leave this blank.
Description - you may write the description of your limiter here.
Queue Actions - leave as default.
Click save after configuration.
Do the same procedure as with the upload limit.
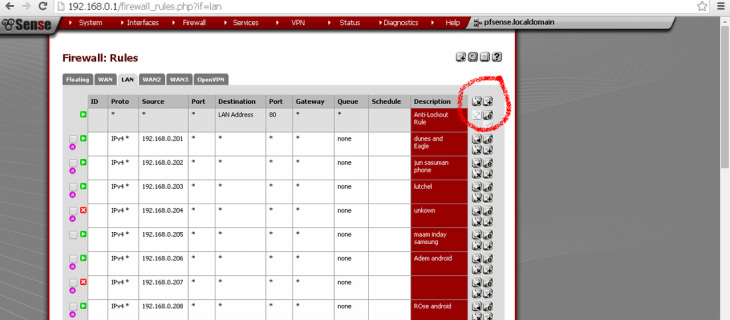
3. Set the rules for the limiter you created on a specific computer or source. Go to pfsense menu
Firewall -> Rules -> click on LAN tab. Click on the plus(+) button to add a new rule.
Enable - click the checkbox to enable limiter and its children.
Name - specify a name for the limiter (ex. download_limit).
Bandwidth - click on plus(+) to set the bandwidth for download_limit.
Ex. Bandwidth - 1 Burst- leave it blank Bw type - kbit/s or mbit/s
Mask - leave this blank.
Description - you may write the description of your limiter here.
Queue Actions - leave as default.
Click save after configuration.
Do the same procedure as with the upload limit.
3. Set the rules for the limiter you created on a specific computer or source. Go to pfsense menu
Firewall -> Rules -> click on LAN tab. Click on the plus(+) button to add a new rule.
4. Configure Firewall Rules.
Action - Pass
Disabled - Unchecked
Interface - LAN
TCP/IP Version - Depends on what tcp/ip version you are using. Commonly it is IPv4.
Protocol - choose which protocol this rule should match. Default is TCP.
Source - Since we are going to limit the download and upload limit of a specific network computer, select in type Single host or alias.
- Specify the IPAddress of the host.
- You can also set port ranges.
Destination - Default type is any. This rule should match to any destinations. Any website the user browse will match this rule.
Advance Features
In/Out - on the first select is the upload limit (In) you created. On the second select is the download limit(Out). Leave all other advance features configurations to default.
Click on Save Button.
5. Go to that computer and perform a speed test if the rule you created is successful. If you create a download speed of 1mbps, then it should give 1mbps result in the speed test.
I hope this one is helpful to you. Thanks for reading. Happy blogging everyone!
